
For extra assistance on absence matters please contact HR@viu.ca or a Tech Champion in your area.
You must be an active employee to see menus or data after you log in.
See menu under "Employee training" for all categories of training materials. We continuously update as we progress through system implementation and updates.
Due to issues within the Employee Portal, all BCGEU employees must now temporarily request leave outside of the system. Visit I'm a member of BCGEU. Can I request vacation or special leave through the system? for more information. All non-BCGEU employees can continue to use the absence module within the Employee Portal.
The Absences module is a menu item found in the Employee Portal. This module is where you can create and manage your requests for leave and submit them to your manager for approval. This process replaces the triplicate Request for Leave forms and emails for most instances of requesting leave.
Once you've entered the module, the Absences window is where you find:
- the launching point where you can create, edit, and/or delete specific requests;
- draft, in progress, and approved requests for leave; and
- the balances of your vacation, sick, and family illness banks.
Although you can see the balance of your sick leave bank in the Absence window, you must still report sick leave to your Time Entry Designate (TED).
Creating, reviewing, editing, and deleting absences
Log into the Employee Portal using your employee credentials.
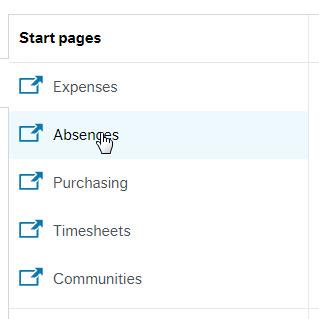
Once logged in, click on Absences under Start pages.
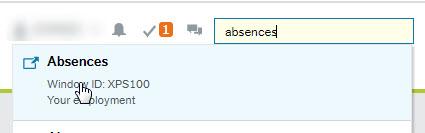
Or, you could search for Aasences in the search bar - make sure you click on the one with the arrow, which indicates that this is a Start pages item.
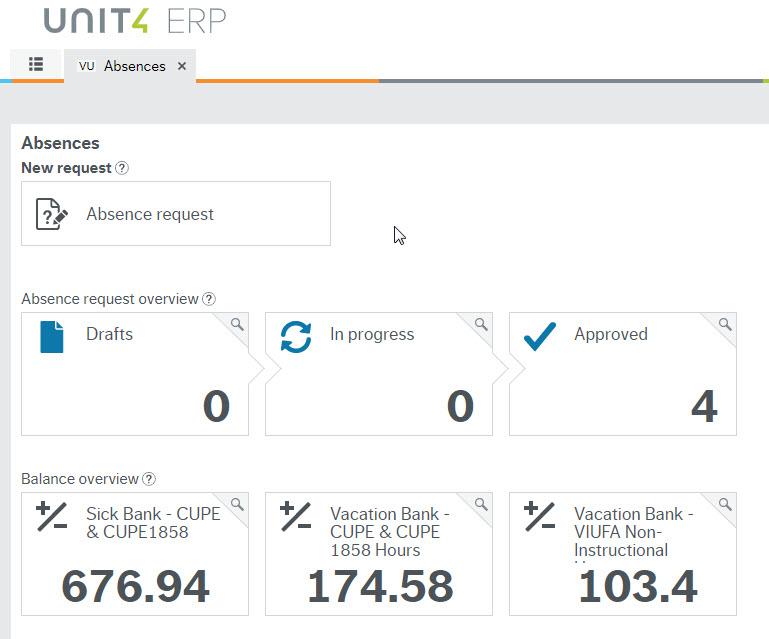
The Absences window will appear. This window is where you can:
- Make requests for vacation or special leave
- Edit your requests
- Delete your requests
- See how much time you have accrued or have banked
Due to issues within the Employee Portal, all BCGEU employees must now temporarily request leave outside of the system. Visit I'm a member of BCGEU. Can I request vacation or special leave through the system? for more information. All non-BCGEU employees can continue to use the absence module within the Employee Portal.
Before you begin, know that there are three significant changes in the new system that may affect you when you try to submit a new request for leave:
- Employees cannot request leave if they have not accrued the hours
- Employees can request leave only up to five months ahead
Employees should request Family Illness leave in the calendar year it will be taken; requests cannot be backdated to the previous year. To submit a request for Family Illness leave for a previous calendar year, contact Payroll.
Visit Absences: How do I submit a request for leave before I have accrued the hours? for more information.
Further, a friendly reminder that VIUFA instructional faculty are not required to submit vacation requests through the absence module. If you are VIUFA instructional faculty and you can see the Vacation VIUFA option in the Reason drop-down menu, it is connected to your VIUFA non-instructional faculty position and should only be used for requesting leave from that non-instructional faculty position.
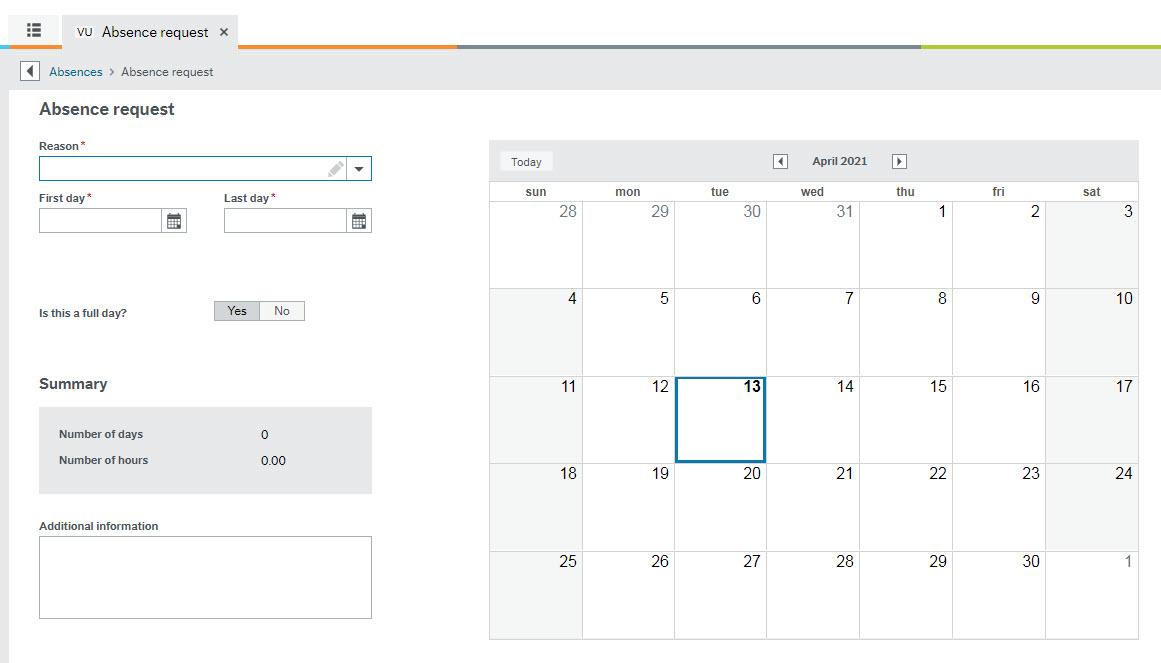
From the Absences window, click on Absence request. The Absence request activity screen will appear.
Overall, the process to submit a request for leave is very simple - just enter the following information:
- Reason for leave
- Dates of leave
- Position you're taking leave from (this drop-down will appear when the dates have been selected)
- If this is a full day or a partial day of leave
- Additional information (if required)
Once you are satisfied with your request and would like to send it to your manager for approval, click on Send for approval.
Of course, things aren't always that simple. Read ahead for more detailed information about submitting your request for leave.
From the Absences window, click on Absence request. The Absence request activity screen will appear.
Select the appropriate reason for your request for leave in the Reason drop-down field. You can either start typing your reason or choose from the drop-down menu by clicking the triangle to the right of the field and selecting your reason. You'll see only those absence codes related to your position's jurisdiction (CUPE, VIUFA, BCGEU, etc.).
Enter the first day of your leave and the last day of your leave. When you select the first day of your leave, the system assumes a one-day leave and populates the Last day field to be the same as the First day field. To adjust your leave to be more than one day, simply change the date in the Last day field. You cannot select your dates by clicking on the calendar; you must use the First day and Last day fields. Press the tab key to anchor your selection.
The Position drop-down will appear. If you have one position at VIU, this field will automatically show that position. If you have two or more active positions at VIU, you will have to select the position that you are submitting your request for. If you are taking leave from more than one position, you will have to submit requests for leave for each position, or you can select "All Positions" from the drop down. If you don't see your current or any position in the drop-down menu here, delete your request for leave and contact Human Resources; the system will still allow you to submit your request for leave but your manager will not be able to approve it.
There are a number of ways to indicate if your request for leave includes a partial day:
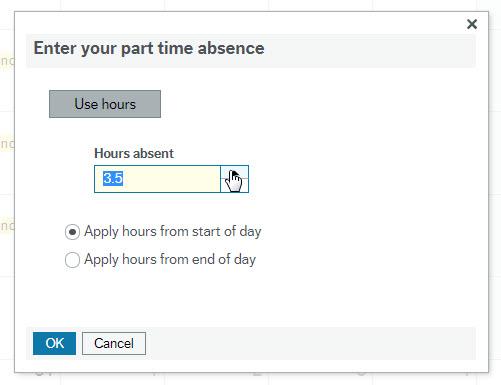
- If you are taking less than a full day of leave, click No next to the question, "Is this a full day?" When the part time absence window appears, enter the number of hours you will be absent; you can enter the number of hours in half-hour increments. Click OK.
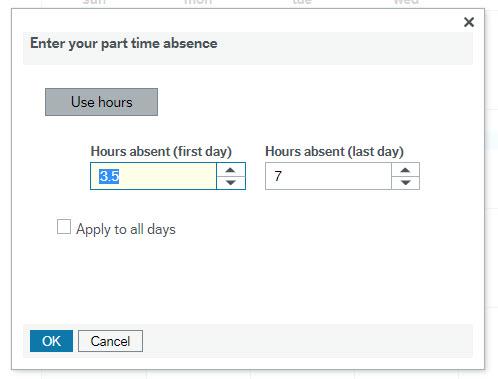
2. If you are taking leave for multiple days and the first or last day of leave is a partial day, you can indicate so by selecting the first and last days of your leave, then clicking "No" next to "Is this a full day?" When the part time absence window appears, you can see fields to make adjustments to the first and last day of your leave in half-hour increments. Click OK.
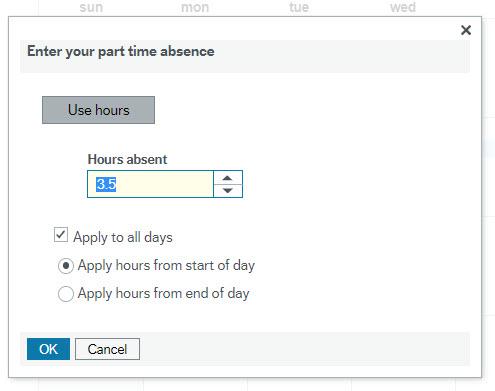
3. If you are taking leave for multiple days and all days of that leave are partial days, you can indicate so by selecting the first and last days of your leave, then clicking "No" next to "Is this a full day?" When the part time absence window appears, click on the checkbox next to "Apply to all days." You can then indicate the number of hours absent for each day and if those hours are to be applied from the start of the day or the end of the day. All days must be exactly the same. Click OK.
Review the summary to make sure that the information being submitted is correct. It will show you the number of days and the number of hours requested. The system takes into account stat holidays and work schedules, so if the hours requested look incorrect, that may be the reason. Visit Absence Requests: My request for leave is showing an incorrect number of hours - what happened? for additional information about how stat holidays and work schedules affect your absence requests.
You can also add additional information about your request in the comment box. This information will be forwarded to your manager with the approval request.
If you are satisfied with your request and would like to send it to your manager for approval, click on Send for approval. If you would like to save a draft of your request and submit the request at a later date, click on Save as draft. You'll be able to find it later on the Absences window under In progress. Once your request is saved as draft or sent for approval, the hours will be subtracted from the appropriate bank or allotment.
Please note that you cannot create a new request for leave for dates that fall outside of the effective dates of your current position. To submit a request for leave in this case, you will have to contact Payroll.
Please note that you will only be able to edit or delete current or future-dated requests for leave that have been submitted through the absence module. To make a change to any request that you have submitted to Payroll, email your manager for approval. Once you have approval, forward it to Payroll.
To edit or delete current or future-dated requests, in the Absences window, find the request that you wish to make changes to:
- Requests that have not been submitted to your manager for approval will be found under Drafts
- Requests that have been submitted to your manager but not yet approved will be found under In progress
- Requests that have been approved by your manager will be found under Approved.
You will not be able to edit or delete an approved request if:
- The date of leave occur in this pay period or earlier; or
- The dates of leave fall outside of the effective dates of your current position.
To edit a request for leave in either case, you will have to contact Payroll.
Once you've clicked on one of the above, a window will appear, listing all of the requests as of the first of this calendar year. Click on the request you wish to change.
The Absence request activity screen will open, showing the details of that request. Make the appropriate changes to the reason, first day of the leave, last day of the leave, position, hours, or additional information.
Once you are satisfied with your request and would like to send it to your manager for approval, click on Send for approval. If you would like to save a draft of your request and submit the request at a later date, click on Save as draft. To delete the request entirely, click on Delete request.
You can make changes to or delete an approved request for leave only if the request is future-dated. Requests that have occurred in the past have been transferred to Payroll for processing. They are no longer editable through the absence module.
If you need to make changes to or delete an approved vacation request, email your manager for approval. Once you have approval, forward it to Payroll.
If you need to make changes to or delete all other approved leaves, email your manager for approval. Once you have approval, forward it to Human Resources.
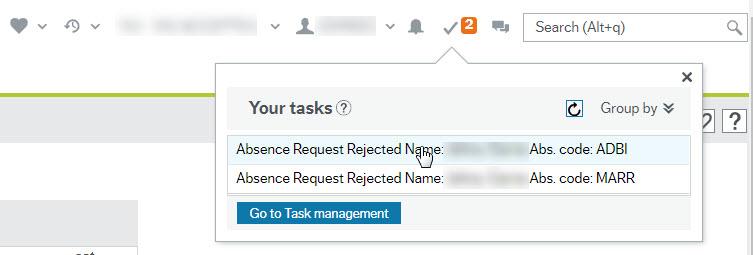
If your request is rejected by your manager, you'll receive a notification with the subject, "Absence Request Rejected" in the Employee Portal.
To see the details of the rejection, make changes to the request, or delete the request, open the Absences window from the Start page. You will not be able to make changes or delete the request from the task manager at this time.
Click on In progress then click on the request that your manager rejected. The Absence request activity screen will open, showing the details of that request.
If desired, you can make changes to the request and resubmit it to your manager for approval by clicking on Send for approval.
If you are not going to resubmit the request for leave, you must delete the request by clicking Delete request. The system anticipates that you will edit the rejected request and thus holds those hours in your request from your bank or allotment. Deleting a rejected request ensures that the system returns those hours to the appropriate bank or allotment.
There's a known issue with Task manager that prevents users from viewing rejected absence tasks in Task manager in the Employee Portal. If you try to view a rejected request through the Task manager, you'll receive an error message that reads, "Access to menu ID 'PS414' is denied, or the menu ID does not exist."
To view the rejected request, go back into the Absences window and find the rejected request under In progress. The Absence request activity screen will open, showing the details of that request.
From here, you can make changes to the request and resubmit it to your manager, or delete the request by clicking Delete at the bottom of the screen.
You can delete an approved request for leave only if the request is future-dated. Requests that have occurred in the past have been transferred to Payroll for processing and are no longer editable through the absence module; in these cases, email your manager for approval and forward the approval to Payroll.
From the Absences window, click on Absence request.
Click on Approved
A window will appear, listing all of the approved requests as of the first of this calendar year. Click on the future-dated request you wish to change.
The Absence request activity screen will open, showing the details of that request.
Click on Delete request.
A notification will go to your manager for approval, which is, in this case, an acknowledgement of the deletion. Once they have done so, you will receive a notification of the approval and the request will be deleted from the absence module.
In the Absences window, you can see how much banked time you have for the following types of leave if you qualify for them:
- Vacation
- Sick leave
- Family Illness
- Overtime
Please note that all requests you make including Drafts and In progress will automatically deduct the hours from the bank balances in this module. It is a good idea to clear out your drafts often to ensure your bank balances in this module are as accurate as possible!
The correct balances as of the last pay period will always be available in your My Balances Report Hours and on your payslip if appropriate.
You can see all banked time you have (as at the last pay period) through many Employee Portal reports. Click on Shared under Reports to access these reports:
- My Balances Report Hours shows you the balance in hours for the banks you have
- My [jurisdiction] Vacation Transactions shows you the accrual and use of vacation hours over each pay period
- My [jurisdiction] Sick Leave Balance shows you the balance or your sick leave bank
- My OT Transactions shows you transactions for overtime hours
- My Special Leave Transactions shows you special leave transactions
Visit Payroll: Where do I find my balances such as sick, vacation, overtime, ProD funds, computer loan, payroll advance, etc.? for more information about your banks and balances.
There are two significant changes in the new system:
- Employees cannot request leave if they have not accrued the hours
- Employees can request leave only up to five months ahead.
To help mitigate any issues with these changes, Human Resources encourages employees to follow these steps:
- Discuss the dates of leave with their manager and receive approval outside of the system.
- Once they have accrued the hours and the date of leave is within five months, the employee can submit the request for leave in the absence module.
You can see the requests that you have saved as draft, submitted for approval, and have had approved in two ways:
1. In the Absences window
All your requests for leave can be found on this screen under one of three categories:
- Requests that have not been submitted to your manager for approval will be found under Drafts
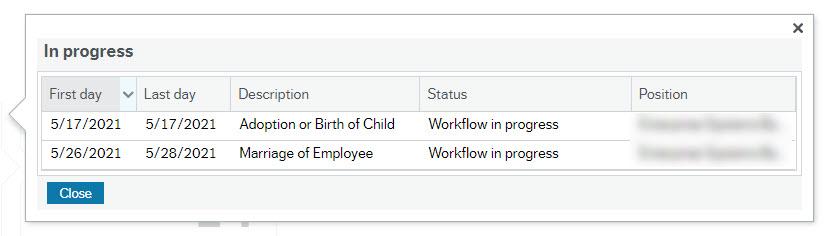
- Requests that have been submitted to your manager but not yet approved will be found under In progress
- Requests that have been approved by your manager will be found under Approved
Once you've clicked on one of the above, a window will appear, listing all of the requests as of the first of this calendar year. If you wish to look for an earlier request, you can change the date next to Show absences back to.
2. In the Absence request activity screen
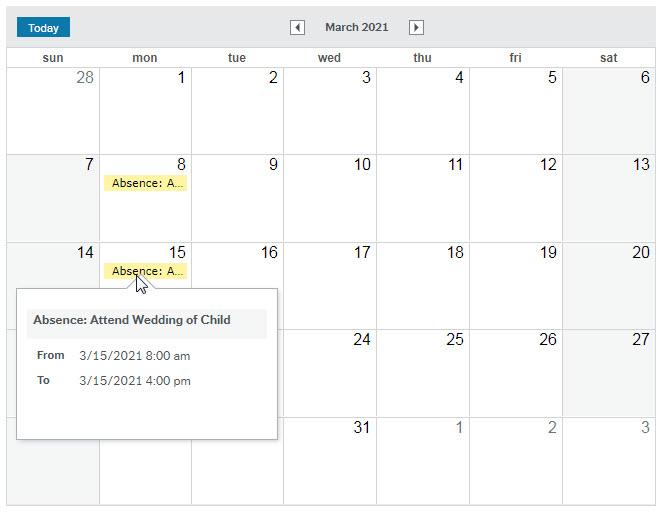
Requests that have been saved as draft, submitted for approval, and have been approved appear on the calendar. You can hover over each request in the calendar for more information. The times indicated on the request will not be accurate as specific hours scheduled are not maintained in the system.
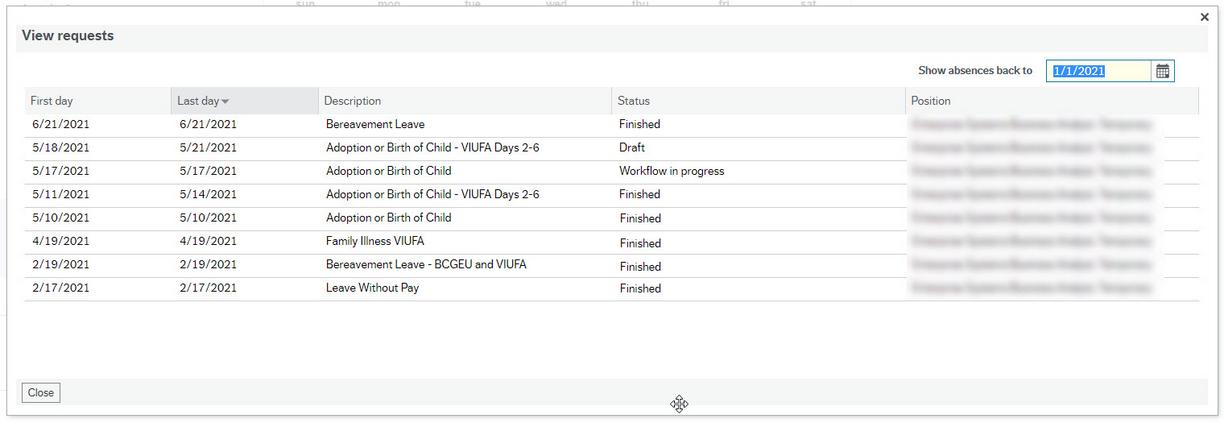
Click on View requests at the bottom of the screen for more information. You'll see a list of requests for leave, with the first and last day of leave, the reason for leave, the position each leave was requested from, and the status of each request. You can double-click on a request to review (and edit, if not approved by your manager) the details of the leave.
There are several different kinds of error messages that you may receive from the system when you try to submit a request for leave:
- Failed to Save: "Date from" must be later than or equal to "date from" on absence code
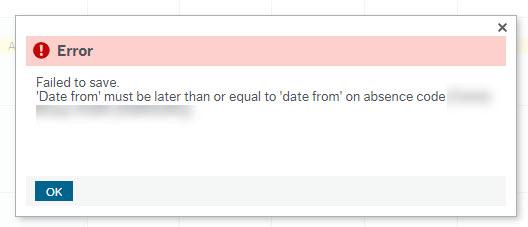
Requests for leave can be backdated only as far as January 1 of the current calendar year. To submit a request for leave for a previous calendar year, contact Payroll.
- Failed to Save: STOP. Limit exceeded ….
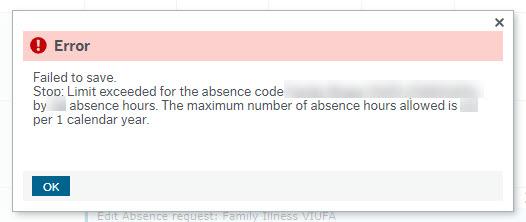
Your request for leave may have exceeded the limits of that specific absence code. If you believe this to be inaccurate, contact Human Resources
- Failed to save. STOP: Balance exceeded for the absence code
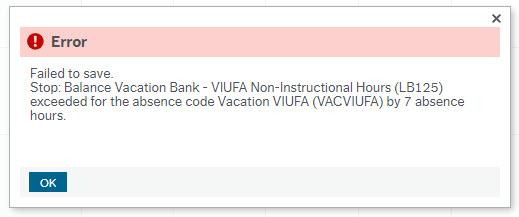
The number of hours in your request exceed the balance of banked time for that specific absence code. For questions about your vacation bank, please contact Payroll; for questions about other banks, contact Human Resources
4. No personal work schedule exists in given time interval
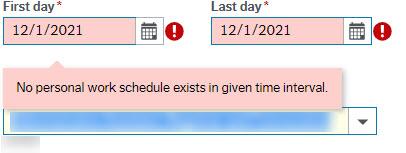
A significant change in the new system is that employees can only request leave up to five months in advance. If you are submitting a request for leave within five months of today's date and you receive this error message, contact Payroll.
Check to see that your request does not include days that you don't typically work, such as holidays and weekends.
You can also check your work schedule by finding the My Position Report. From the Employee Portal start page, under Reports, click on My Position Report. Under Work Schedule you can see what kind of work schedule you have. If this is incorrect, please contact your department's appointment creator to have this fixed.
Visit Human Resources: Where do I find details about my pay rate, work schedule, dates, etc. for my positions? for more information on the My Position Report.
There are some absence types that employees cannot request through the absence module. This is usually because there are some requirements or extra paperwork that currently cannot be processed through the employee portal.
1. Leave Without Pay, Public Duty Leave, and Union Leave (VIUFA)
To request leave for these absence types, email your supervisor requesting approval for leave. Your supervisor will forward their approval to Human Resources. Once Human Resources receives approval for the leave, they will check to see if there is any other information they need. They will contact you if there is. If HR has all the information that they need, they will forward the information to Payroll to be processed.
2. Union Leave (CUPE and BCGEU)
To request leave for these absence types, use the appropriate form from your union, then forward it to Human Resources. Human Resources will check to see if there is any other information they need. They will contact you if there is. If HR has all the information that they need, they will forward the information to Payroll to be processed.
3. Sick leave
Sick leave cannot be self-reported in the absence module. You must report any sick leave through your Time Entry Designate (TED).
Currently, fulltime BCGEU members can request leaves via the Employee Portal using 7 hour days and 35 hour work weeks as their guide. See this document from HR outlining the specific practice. For example, you request a full 7 hours of leave for a full day off and request 3.5 hours of leave for a half day off.
All part-time BCGEU members are to temporarily request leave outside of the system for the foreseeable future:
- Download the BCGEU Request for Leave form and save a copy to your computer
- Fill in the form with the details of your request for leave
- Email the form to your supervisor for approval
- Forward the form with your supervisor's approval to Payroll
All non-BCGEU employees continue to use the absences module within the Employee Portal.
Employees who are on timesheets can request vacation and special leave through the absences module; however, a timesheet for the hours requested must also be submitted. This will ensure that the leave time taken is accurately reflected in the employee's pay.
When submitting a request for leave in the absences module, these employees will have to override the hours requested as the system will always show a 24-hour work day. To override the hours, click on "No" next to "Is this a full day" then enter the number of hours that you would have worked.
Time Entry Designates (TEDs) should be entering only sick leave for employees, and only in the absence entry screen.
There are two different screens in the Employee Portal where absences can be entered, but they have two very different purposes:
- The Absence request activity screen is where you would submit your own vacation and special leave requests
- The Absence entry activity screen is where you report sick leave for your department
However, due to the configuration of the system and to their extra access, TEDs can see:
- Sick leave codes in the Absence request activity screen; and
- Non-sick leave codes in the Absence entry activity screen.
If you are a TED, you must ensure that all sick leaves are entered in in the Absence entry activity screen, and your personal vacation and special leave requests are submitted in the Absence request activity screen. You should not be entering your own sick leave, nor should you be entering non-sick leave for other employees.
Non-sick leave requests submitted in the absence entry screen will be monitored by HR – Benefits. HR will contact you if a non-sick leave code has been submitted in error.
There are a couple of things that you can do if your request for leave was submitted to your manager for approval but hasn't been approved yet:
- Double-check that it was actually submitted for approval. If it appears in Drafts, it has not been submitted to your manager. Open the draft request and make sure you click Send for approval at the bottom of the form.
- Check in with your manager. ERP is currently not configured for emails or notifications to go out once a request for leave is submitted. Some employees aren't in ERP daily so it's easy for requests and tasks to go unnoticed.
- Check with HR to see if your position record is showing the right manager. If your manager, or reviewer if your department has one, has not seen the request for leave, contact HR to make sure that your position is showing the appropriate organizational structure.
Information for reviewers
A reviewer is someone in a position that has been authorized to vet requests for leave before official approval by the manager. Once the reviewer has vetted a request for leave, the request is then forwarded to the manager for approval. Not all departments, or positions within a department, will have reviewers for their positions.
A reviewer will receive all requests for leave, not only vacation requests, for the positions that they are the reviewer on. They will also have to "approve" requests before the system sends them to the manager; the manager will not receive a notification about the request until the reviewer has "approved" them. For some reviewers of large departments, this means that there would be a great volume of extra work.
Please note: when reviewing tasks, the action items available are approve and reject. However, reviewers do not have the authority to officially approve requests for leave from employees in their department. The reviewer’s role is to vet the requests before the system sends them to the employee’s manager for official approval.
To have a reviewer set up in your department, contact HR.
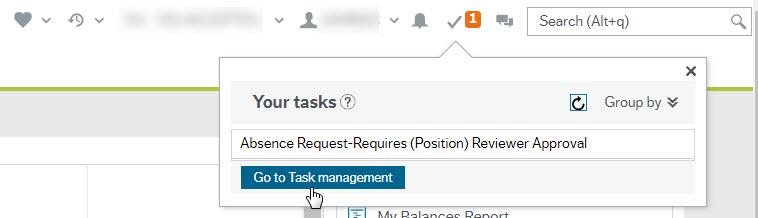
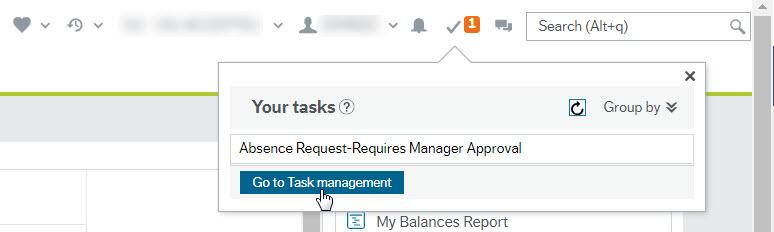
You'll receive a notification that there is a new absence request to review. Click on Go to task management to see the details of the request
Once you've reviewed the task, click on the checkbox next to each request that you want to approve or reject, then click Approve or Reject under Absences, as appropriate. Once you have clicked on Approve or Reject, the appropriate action will appear in bold in the Action column. Click Save at the bottom of the screen.

If you approve the request for leave, the request will go to the employee's manager for official approval.
If you reject the request, you must add a comment giving the reason for the rejection. The system will send the request back to the employee to give them an opportunity to edit and resubmit their request for leave. The manager will not receive any reviewer-rejected requests.
Information for managers
You'll receive a notification that there is a new absence request to review. Click on Go to Task management to see the details of the request.
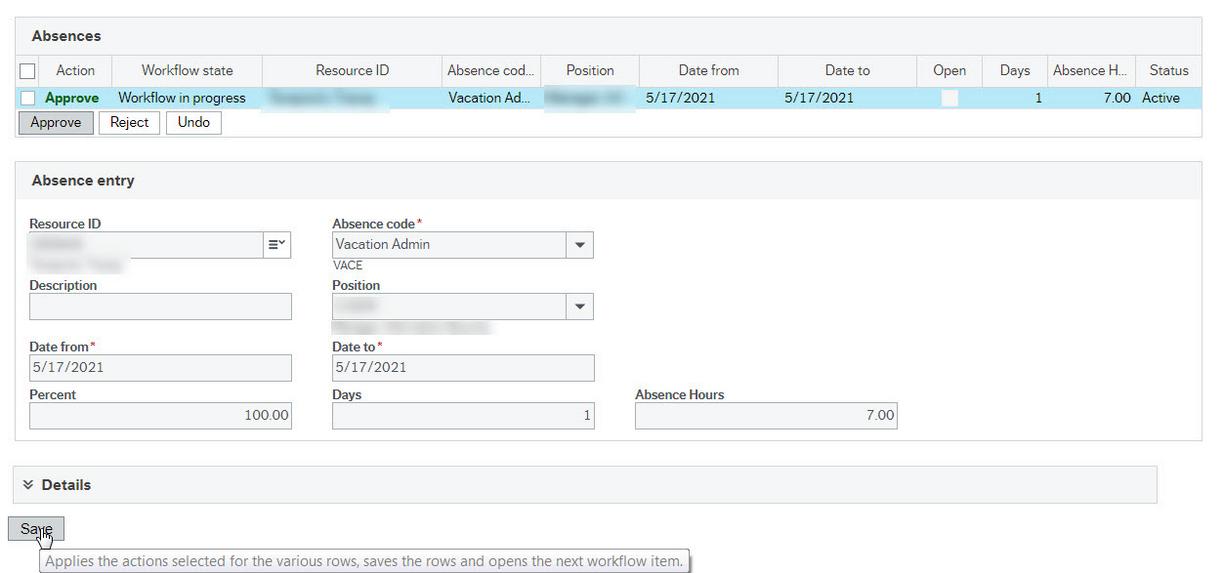
Once you've reviewed the task, click on the checkbox next to each request that you want to approve or reject. Then click Approve or Reject under Absences, as appropriate. Once you have clicked on Approve or Reject, the appropriate action will appear in bold in the Action column. Click Save at the bottom of the screen.
If you receive a request to delete a previously-approved request for leave, make sure that you click Approve and then Save. This confirms that you have approved that the request can be deleted and the request will be removed from the system.
If you approve the request for leave, the employee will be notified of the approval.
If you reject the request, you must add a comment giving the reason for the rejection. The system will send the request back to the employee to give them an opportunity to edit and resubmit their request for leave. If you have a reviewer in place, they will also receive notification of the rejection.
During your absence you can assign a substitute to manage requests for leave on your behalf. This person will receive a copy of all requests for leave sent to you, and they will be able to approve or reject them. Once your substitute approves or rejects each request for leave, they will be removed from your task list. Following the last day of your absence, your substitute will no longer receive a copy of requests for leave sent to you.
It is not necessary to assign a substitute; in the absence of a substitute, your request for approvals will be available for review upon your return.
From the Start page, click on Activate your substitutes under Your employment.
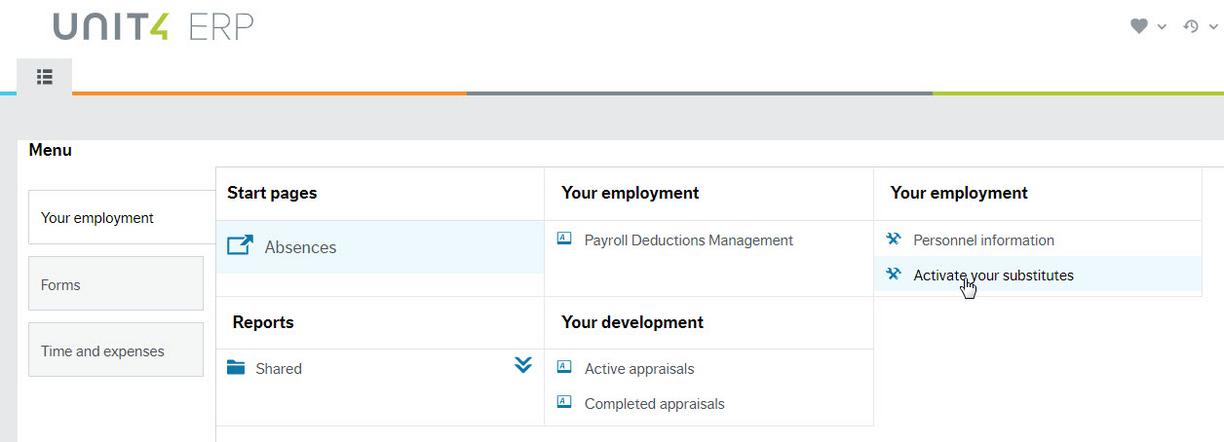
Or, you can search for "Activate your substitutes" in the search bar.
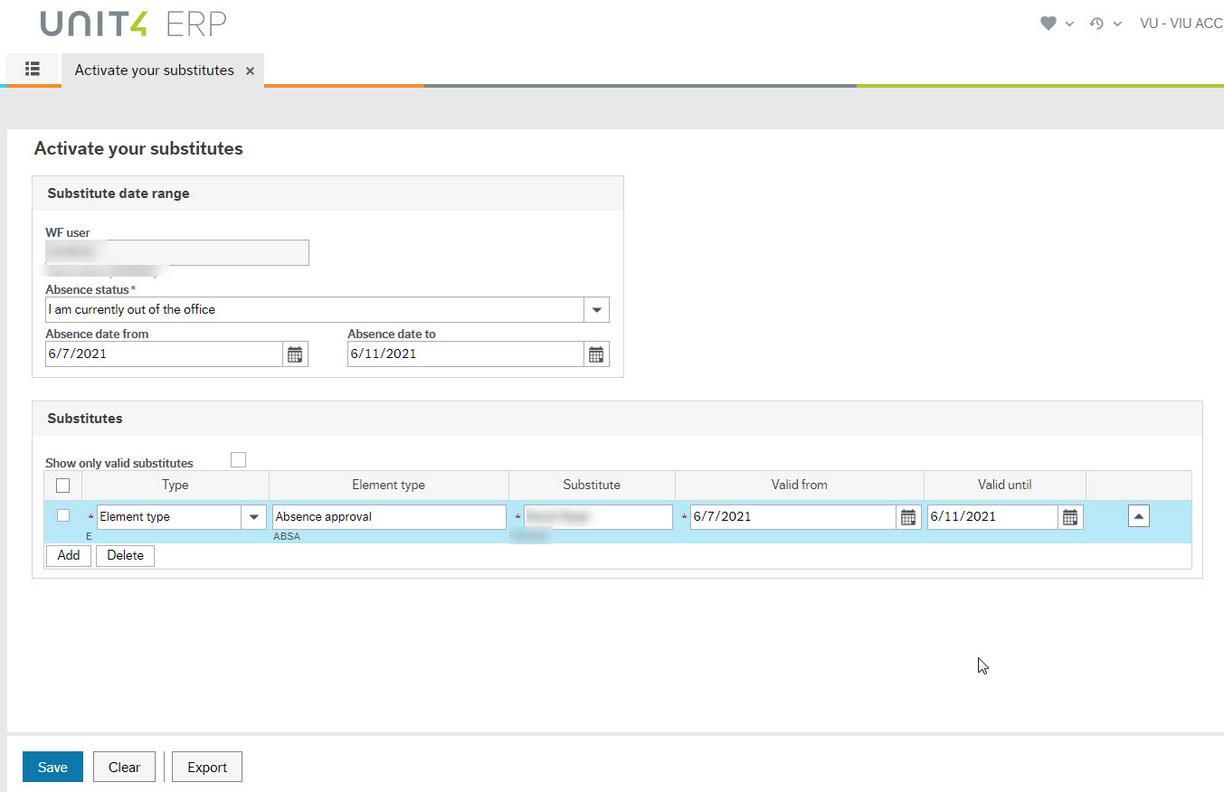
The Activate your substitutes activity screen opens. Complete the following steps:
- Change your absence status to read, "I am currently out of the office."
- Using the calendars, enter the first day and last day of your absence. The system uses these dates to redirect absence requests received during your absence.
- In the Substitutes section, click Add
- Click the drop-down arrow next to "Type" and select "Element type." Selecting Element type will redirect specific approval types to your substitutes.
- Click the drop-down arrow next to "Element type" and select the element type "Absence approval." This will send a copy of all requests for leave to your substitute during your absence.
- In the Substitute column, select your substitute by typing their name
- Enter the date range that you would like the system to send your requests to this specific substitute. You can assign more than one substitute to receive your requests on different dates.
- Click Save
If you receive a request for leave from an employee who does not report to you, take the following actions:
- Reject the request. In the comments, state that you will contact Human Resources to notify them of the reporting error.
- Contact Human Resources with the following information:
- Employee's name and position (information available on the request for leave);
- Date(s) of leave
- Type of absence requested; and
- The name of their current manager (if known).
Human Resources will verify the reporting structure and make the appropriate changes in the system. Then they notify the employee when they can resubmit their request for leave.
Managers can access a report in the Employee Portal to view a summary of leave requests from employees who report directly to them. This report, called "My Management Absences", shows the following information:
- Employee's name, resource ID and position;
- Dates of leave;
- Total hours of leave;
- Type of leave; and
- Status of the leave request
The report will not show:
- Employees who have no leave transactions;
- Employees who have been paid out their vacation pay;
- Employee's requests for leave if the leave is future-dated and submitted to Payroll via email. Once the leave has taken place and Payroll has processed the request for leave, it will appear on this report.
To access the report, follow these steps:
- Log into the Employee Portal using your employee credentials
- From the main page, under Reports, click on Shared, then click on Manager Reports
- Click on My Management Absences
- The report will run and display in your browser window
If you cannot see this report or wish to authorize someone else in your department to have access to it, send an email from the Divisional lead to payroll@viu.ca identifying the employee approved to have access and payroll will send in a ticket to IT.
The report will return results from only the current logged-in user. That means that if a non-management employee runs this report, they will get no results as no employees report directly to them. You will not be able to ask anyone else in your department to run this report for you.
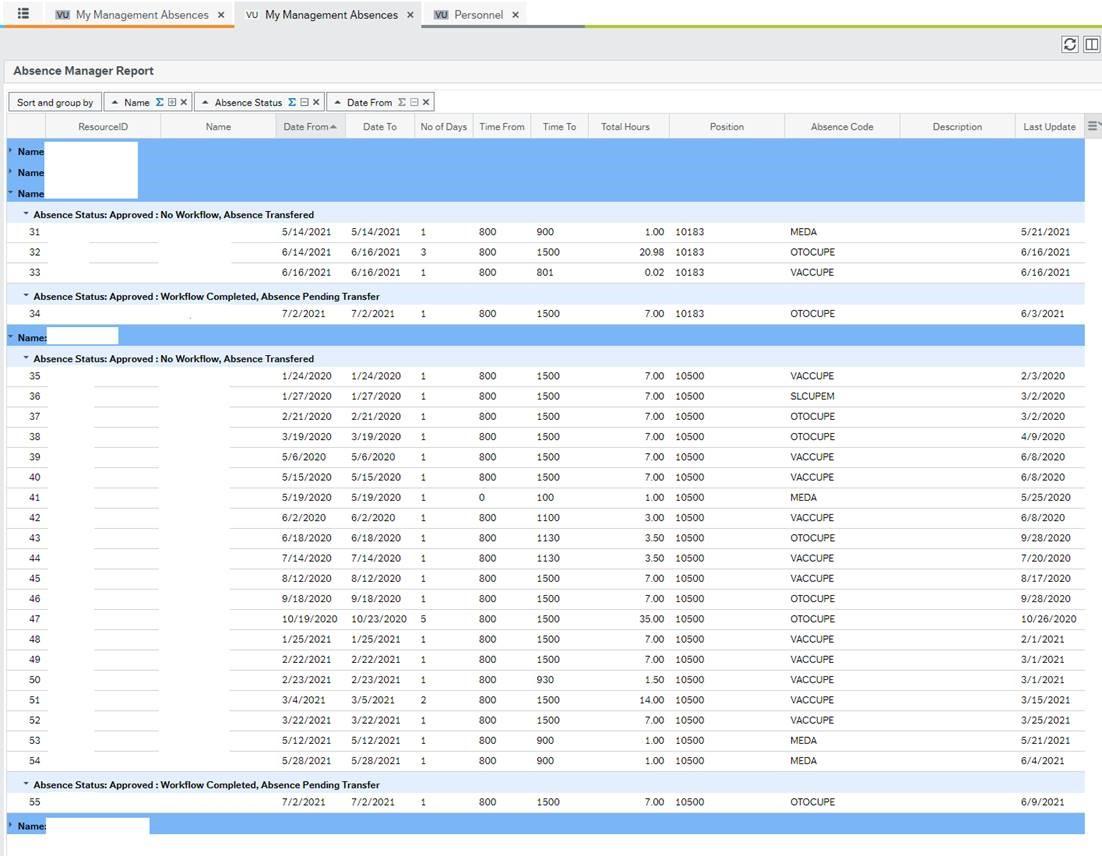
The absences in the report are categorized by workflow status:
- Not Yet Approved : Workflow Currently in Progress Indicates that a request for leave has been entered in the absence module and is not yet complete. The request may be sitting with a reviewer or manager for approval or could be sitting with the employee pending changes after a rejection.
- Approved : No Workflow, Absence Transferred Indicates that the request for leave was entered by Payroll either before the absence module was launched or due to a special circumstance where the employee cannot enter the absence on their own (i.e. - backdated absence request). These requests are historical and have been processed by Payroll.
- Approved : No Workflow, Absence Pending Transfer Indicates that the request for leave was entered by Payroll either before the absence module was launched or due to a special circumstance where the employee cannot enter the absence on their own (i.e. - backdated absence request). These requests have not been processed by Payroll.
- Approved : No Workflow, Absence Partly Transferred Indicates that the request for leave was entered by Payroll either before the absence module was launched or due to a special circumstance where the employee cannot enter the absence on their own (i.e. - backdated absence request). These requests have been partially processed by Payroll due to the dates of the request and how it falls within the pay cycle (i.e., the dates within an absence request fall across two pay cycles).
- Approved : Workflow Completed, Absence Transferred Indicates that the request for leave was entered in the absence module, was approved by the manager (and reviewer, if applicable) and has been processed by Payroll.
- Approved : Workflow Completed, Absence Pending Transfer Indicates that the request for leave was entered in the absence module and was approved by the manager (and reviewer, if applicable) but has not yet been processed by Payroll and can still be edited or deleted by the employee.
- Approved : Workflow Completed, Absence Partly Transferred Indicates that the request for leave was entered in the absence module, was approved by the manager (and reviewer, if applicable) and has been partially processed by Payroll due to the dates of the request and how it falls within the pay cycle.
Workflow Status : R - Absence Status : N Indicates that the request for leave was entered in the absence module, was rejected by the manager (or reviewer, if applicable) and has been returned to the employee for deleting or for editing and resubmitting.
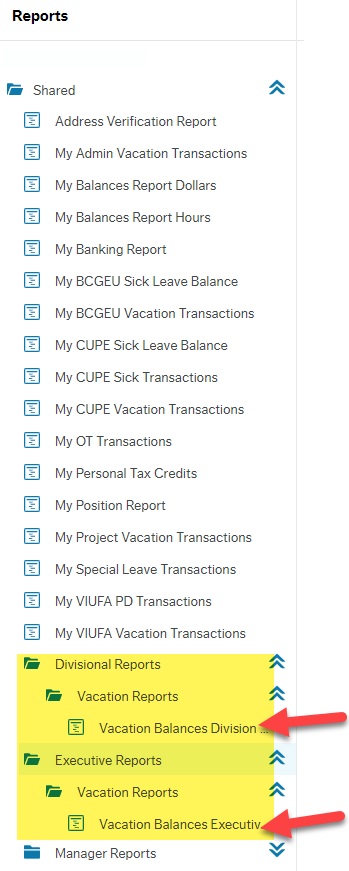
There are two reports that allow access to view Vacation balances for an area. These reports are only visible to the Division leader (and their assigned designate) or the Executive level positions (or their designate). The reports are:
- Vacation Balances Division
- Vacation Balances Executive
From the home screen (automatically opens to Your employment menu) in the Employee Portal go to the Reports heading, click on Shared and then you will see either:
- Divisional Reports > Vacation Reports > Vacation Balances Division or
- Executive Reports > Vacation Reports > Vacation Balances Executive or both
If you cannot see this report or wish to authorize someone else in your department to have access to it, send an email from the Divisional lead to payroll@viu.ca identifying the employee approved to have access and payroll will send in a ticket to IT.
Vacation Balances Division:
Clicking this report opens this screen:

If you just click OK and don't enter any data in the Value field you will get a comprehensive report showing you everyone's vacation balance in your division (please do not enter anything in the field that defaults to say Like):
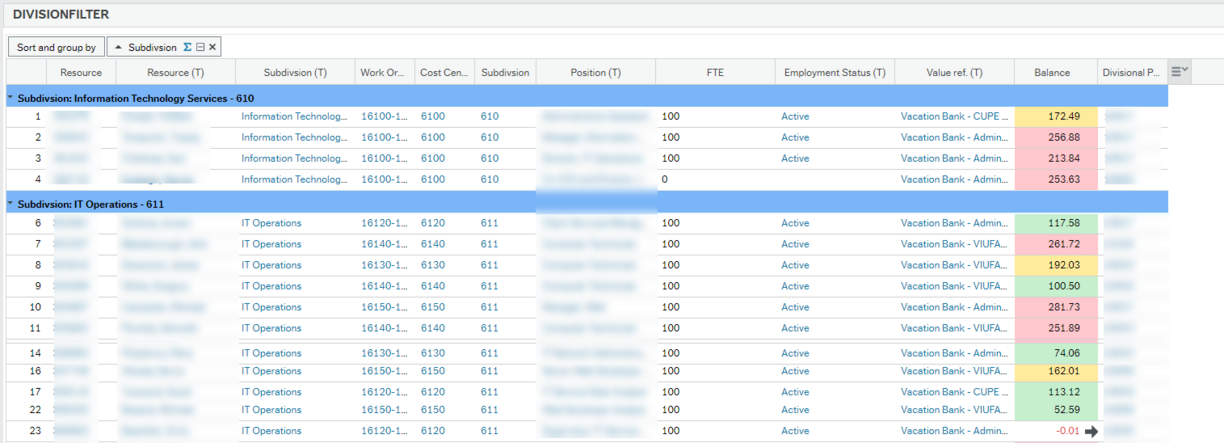
If you want to see only your direct reports and their vacation balances, enter your position number in the Value field - you can use type ahead with your position title if you don't know the number. The designate should enter the manager's position in the field. To find your position, open the My Position Report in the Shared folder just above this one.
These balances are accurate as of the last pay period and do not include unprocessed vacation requests, adjustments or payroll entries.
If you Export this report, the coloured formatting will not be exported. This report is designed primarily for viewing and not printing. You can export it as an Excel file and apply your own formatting.
- Red is for more than 200 hours
- Yellow is for 151 to 200 hours
- Green is for less than 150 hours
Vacation balances Executive
The same instructions as above apply for this report though the vacation balances will be for either all employees in your executive branch if you leave the Value field blank or only the employees in your executive branch who report directly to you (direct reports) if you (or your designate) enter your position number in the Value field.
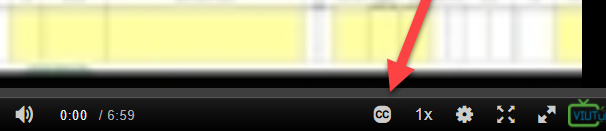
Training video tips
- Enlarge videos by clicking on arrows in bottom right of the video.

- Click on the 1x on the bottom of the video to adjust the playback speed faster or slower.
- Closed captions can be turned off by clicking the "cc" on the bottom of the video.
- For specific instructions such as accessing a Payroll or HR report or your payslip, see the appropriate page on the training website. More details are on the home page or use the menu on this page.